Back to TheWorxHub for Senior Living Main Menu
Adding Purchase Orders
You can add purchase orders to your WorxHub account.
Watch the Video Tutorial:
How to Add a Purchase Order
To add a new Purchase Order:
- Click Add at the top of your screen, then select Purchase Order.
General Info
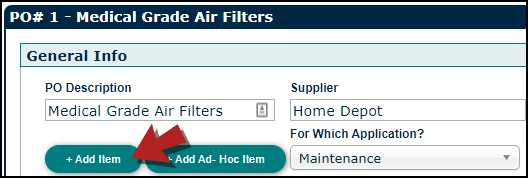
- Enter a PO Description. This will serve as the identifying field on the list of POs.
- To select a Supplier, click on the supplier picker icon (
 ) and choose the appropriate supplier from the pop-up window, then click Select.
 - Edit the Due By and Delivery Estimate dates as needed. *Note: Order Date will automatically fill in with the current date when you select the On Order status.
- Choose a Department from the drop down menu.
- Enter a Terms period in days.
- If needed, enter an Invoice Reference number.
- Click Save.
Adding Items to the PO
Once you click Save, you can begin adding items to the PO. You can add inventory or assets that you already have in your account or add an Ad-hoc item.
Add Inventory or Asset
- To add an item from either your inventory or fixed asset list, click the Add Item button and a pop up window will appear.
- Choose whether you are adding Inventory Items or Fixed Assets.
- Check the box next to the item(s) you would like to add to the PO.
- Edit the Price and Order Quantity as needed, then click Save.
Add Ad- Hoc item
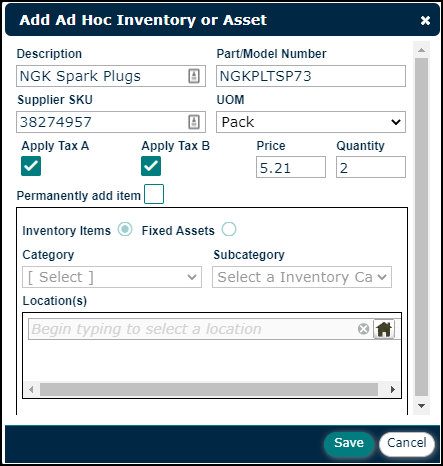
- To add an item to the purchase order that is not already in your system, click the Add Ad- Hoc Item button and a pop up window will appear.
- Enter a Description. This will serve as the identifier in the list of all items.
- Enter a Part/Model Number and Supplier SKU.
- Select a UOM (Unit of Measure) from the pick list.
- Enter the Price and Quantity information.
- If you would like to add this item to your system, check the box next to Permanently add item.
- Choose whether you are adding Inventory Items or Fixed Assets.
- Select a Category and Subcategory from the pick lists.
- Use the Location(s) search field to either type and select the name of the location, or click the Location Picker (
 ) to select the appropriate location from the list.
- Click Save.
Email Purchase Order
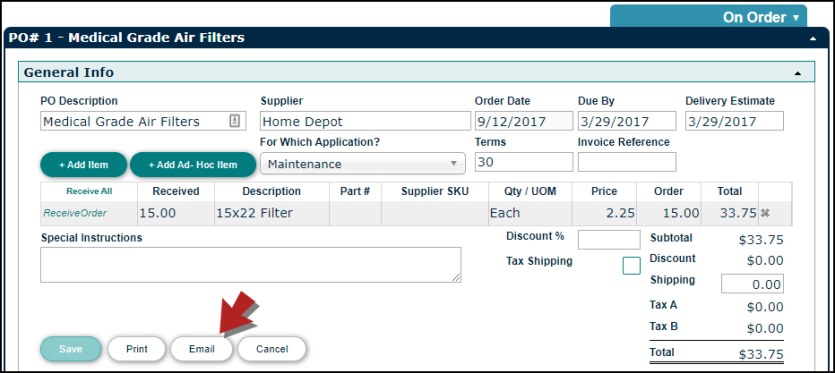
- Select the Email button to email the purchase order to the supplier as a PDF attachment.
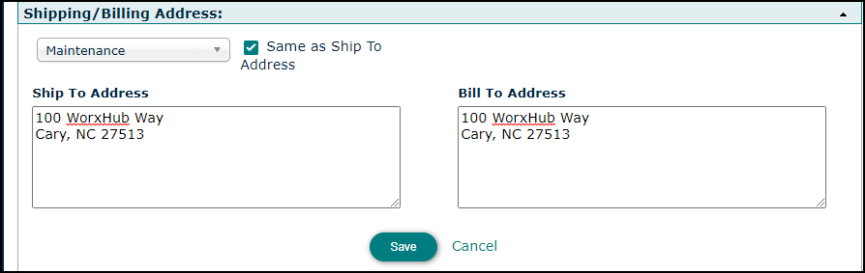
Shipping/Billing Address
- Click on Shipping/Billing Address to expand this panel.
- Select the Department from the drop down menu.
- Type the Ship To and Bill To Address in the text fields.
- Click Save.
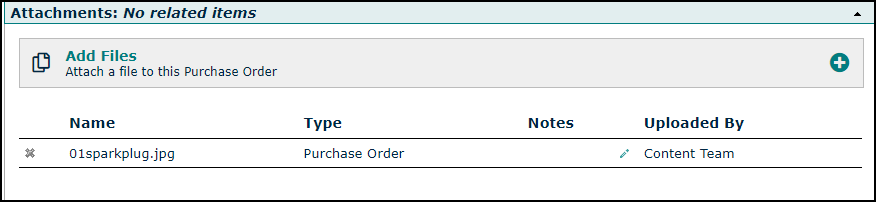
Attachments
- Click on Attachments to expand this panel.
- Click on Choose a File, then select one of the uploading options:
- From Computer - Browse your computer to find and select the file.
- From the Web (URL) - Enter the URL, then click OK.
- From Dropbox - After logging in to your Dropbox account, find and select the file.
- Enter any necessary Notes, then click Upload.
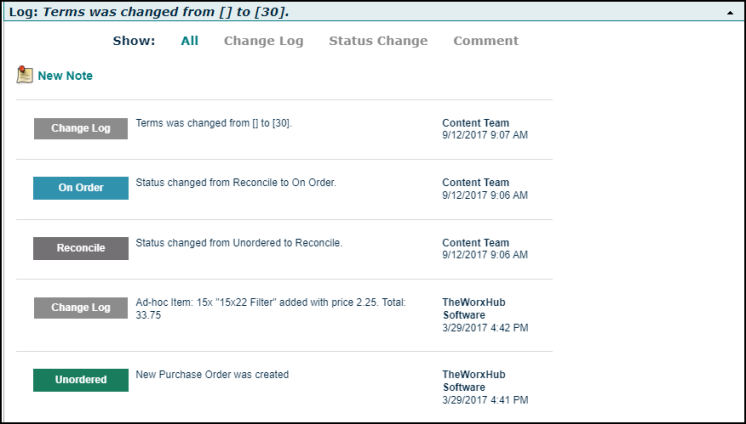
Log
- Click on Log to expand this panel. In this section, you can view any changes or additions made to the template such as status changes, notes, or comments.
- To add a note to the Log, click on New Note.
- Enter the details of the note in the text field, then click Save.
PO Status
- Unordered - This status indicates that the items on the PO have not been ordered yet.
- On Order - This status indicates that the items on the PO have been ordered, but not received.
- Hold Approval - This status means that the items in PO cannot be ordered without further approval.
- Back Order - Use this status to indicate that some or all items on the PO are back-ordered.
- Cancelled - If the PO needs to be cancelled, use this status.
- Reconcile - This status is to represent that the items have come in, but accounting needs to confirm that the invoice from the supplier matches the PO information.
- Completed - All items have been delivered, and the PO information has been reconciled with the supplier invoice.
If you need to create multiple POs with similar information, you can utilize the Duplicate feature.
- If you have clicked on an existing PO from the search results list, click on the Duplicate PO link in the bottom left of the pop up window.
- If you have just created and saved a PO, click on the down arrow next to the New Purchase Order button at the top right of the screen and select Duplicate PO.
